Capturing Nodes Like a Boss: A Developer’s Guide to Screenshotting DOM Elements
This guide unlocks the secrets of node screenshots, your ultimate weapon against confusing DOM elements. Learn advanced techniques, code examples, and pro tips to capture any node, anytime.

Yo, fellow coders! Let’s face it, debugging can be a frustrating journey into the abyss of the DOM. Sometimes, words just don’t cut it, and you need a visual representation of that funky element causing havoc. That’s where node screenshots come in, your trusty allies in the fight against pixel-perfect perfection.
Why Node Screenshots?
Imagine this: you’re working on a slick new layout, but that pesky button refuses to center itself properly. You could spend hours combing through CSS rules, or you could capture a node screenshot, zoom in, and pinpoint the exact source of the misalignment in seconds. Boom! Problem solved, frustration averted.
But node screenshots aren’t just for layout woes. They’re invaluable for:
- Reporting bugs: Capture the exact issue for your teammates or clients, avoiding lengthy explanations and misunderstandings.
- Sharing design mockups: Showcase UI elements with pinpoint accuracy, eliminating the need for lengthy descriptions.
- Documenting code: Add visual references to your code comments, making your codebase more self-explanatory for future you (or your colleagues).
- Brainstorming and prototyping: Quickly experiment with different designs and layouts without firing up complex design tools.

Method Madness: Choosing Your Weapon
Now, there are more ways to capture a node screenshot than there are CSS frameworks (and that’s saying something!). Let’s explore your options:
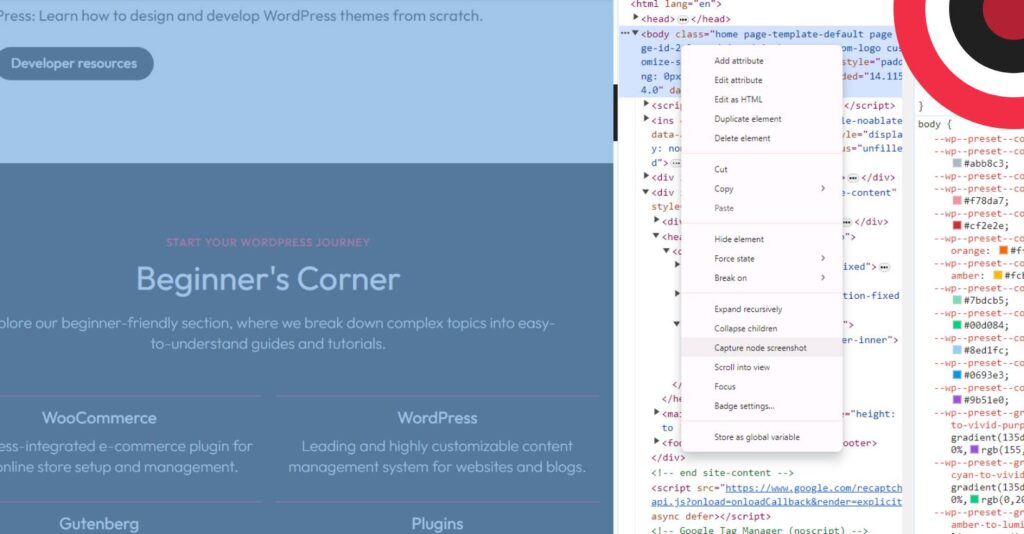
1. Built-in Browser DevTools:
- The OG method: Every major browser (Chrome, Firefox, Edge) has built-in DevTools with node screenshot functionality.
- Pros: Simple, convenient, doesn’t require additional software.
- Cons: Limited features, might not capture hidden or overflowing content.
2. Browser Extensions:
- Spice up your life: Extensions like FireShot or Nimbus Capture offer more control and features like annotations and image editing.
- Pros: Customizable, often free, additional functionalities.
- Cons: Can slow down your browser, and might have limited free plans.
3. Standalone Screenshot Tools:
- Going pro: Tools like Snagit or Lightshot give you ultimate control over capturing specific areas of your screen.
- Pros: Powerful features, and flexible capture options, often include editing tools.
- Cons: Paid options, might have a steeper learning curve.
4. Code-Based Solutions (for the adventurous):
- Flex your coding muscles: Libraries like Puppeteer or Playwright allow you to automate browser interactions and capture screenshots programmatically.
- Pros: Highly customizable, automates repetitive tasks, integrates with your dev workflow.
- Cons: Requires coding knowledge, might be overkill for simple screenshots.
Pro Tips for Node Screenshot Mastery:
- Capture the right size: Don’t go overboard and capture your entire screen. Select just the relevant node for clarity.
- Mind the details: Use high resolution for zooming in and identifying subtle issues.
- Name it right: Use descriptive names for your screenshots to easily identify them later.
- Annotate like a pro: Add arrows, highlights, and text to pinpoint specific problems.
- Share wisely: Use platforms like Imgur or Google Drive for easy access and collaboration.
Remember, the best method depends on your needs and preferences. Experiment, find what works for you, and capture those nodes like a ninja!
Was this post helpful? ( Answers: 0 )
Leave a comment
If you enjoyed this post or have any questions, please leave a comment below. Your feedback is valuable!